Home Mushroom Cultivation From Scratch, is an article written by Mark Sanborn about his process of obtaining a mushroom from the wild and getting it to grow at home. This is his story:
Home Mushroom Cultivation From Scratch
This summer I had the idea of taking an oyster mushroom from the wild and see if I could get it to grow. Here is how I did it.
1.) Find a wild species known to regenerate from stems. See Paul Stamet’s “Mycelium Running” for a complete list.
Materials:
* Lots of time (looking for mushrooms)
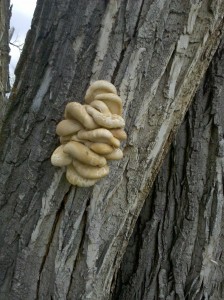
I used Pleurotus ostreatus, or oyster mushroom for my experiments. Oyster mushrooms make great candidates as they are very forgiving and one of the fastest growing species of fungi. If this is your first attempt at mushroom cultivation I highly suggest you start with an oyster species.
2.) Make a Clone
Materials:
* Clean cardboard
* Water
* A Microwave
* Microwavable safe bowl
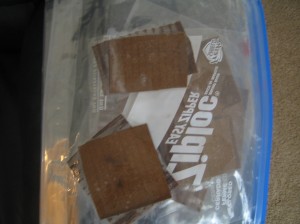
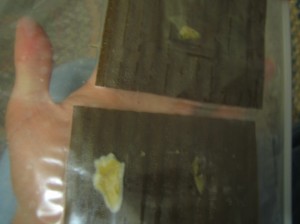
 Start by finding some clean cardboard, soak it in water and put it in a bowl in the microwave for two to three minutes. This will help separate the cardboard and expose the corrugated part of the cardboard. Take your fresh specimen that you collected from from the wild and tear apart the stem at the base. It is best to just rip the mushroom open instead of using something to cut it like scissors or a knife.
Then, place a small piece on the wet cardboard and place in a ziplock bag and forget about it for awhile. It can take several days to 3 weeks before the cardboard is completely eaten up by the mycelium depending on the species. It doesn’t really matter where you store this. Contrary to popular believe mushrooms do NOT need to be in complete darkness.
Here are a few pictures of my cardboard clones just a few days after, notice one of the chunks is starting to form mycelium and is starting to “leap” onto the cardboard. The other pieces were unfortunately taken from an older mushroom and didn’t end up regenerating. I found that the younger mushrooms had a better chance at regenerating.
After waiting until most of the cardboard has turned white it is time to transfer to grain.
3.) Making Grain Spawn
Materials:
* Mason canning jars
* A pressure cooker
* Tyvek
* A large nail
* Wild bird food
Fill your pressure cooker with jars to determine how many jars you can fit in your pressure cooker. After finding out how many jars can fit in your pressure cooker take those jars and fill them half way up with DRY wild bird food. At the same time start a large pot of water and fill it half way with water. Put it on a burner on high until it starts to boil. As soon as it starts to boil move the pot to cold burner and turn the heat off. Pour all jars containing dry bird food into the boiling water and put a lid on the pot. Set the timer for 20 minutes.
After 20 minutes remove the lid. You should see sunflower seeds and other debris floating on top. Poor the debris into a strainer and throw it away. Rinse the rest of the grain with water and let set in a strainer to drain for 30min.
After completely straining start loading the jars half way up with wet grain. After all the jars are filled about half way you should have quite a bit of bird food left because the grains will have expanded with moisture. Continue filling the jars distributing the grain evenly amongst the jars.
Take the lids of each of your jars and poke 4 small holes with a nail into each lid, alternatively you can drill at 1/4 inch hole in the center of the lid.
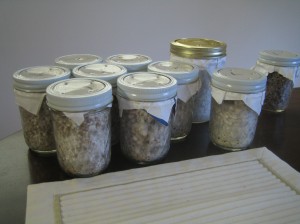 Take some Tyvek and cut a small square and put them over the opening of the jar. Place the lid on backwards (orange/red gasket facing up) and seal the lid hand tight (Don’t over tighten). After a few trials I found the best way to do this was actually take a sheet of Tyvek and place over the jar, screwing the lid tight and then cutting around the jar after the Tyvek is already screwed on.
Fill your pressure cooker with enough water to last 1.5 – 2 hours. I found only a half inch or so will work for my pressure cooker. Pressure cook the jars for 1.5 – 2 hours. Once done, remove heat and let set overnight or until cool.
4.) Inoculation
Materials:
* 1-2 Weeks
* Clear plastic tub (optional)
* Knife/saw (optional)
Making a “still air” box (optional)
A “still air” box is simply a clear plastic box with holes cut out of the sides to allow jars and hands to be placed inside to work with little air movement. I made mine by taking a coffee container and tracing it on the tub and then cutting the holes out. Another great method is to just take a clear plastic tub, take the lid off and flip it upside down near the edge of a table. Let the box hang over the table and place your hands up through the opening. The best part about this method is that you don’t have to cut any holes and the tub can be reused later for something else.
After washing your hands carefully loosen the lid of the sterilized grain jar and get ready to transfer a piece or the entire cardboard chunk into the jar. In one swoop put the colonized cardboard into the grain jar and tighten the lid. I did this in a “still air” box but you can do this in the open air. If you decided to do this in open air don’t be shocked to find a 50% contamination rate (jars with mold/bacteria) depending on the growth rate of the mycelium. With the still air box you should have about a 1-10% contamination rate. Also remember that your wild specimen came from the wild and is far from sterile. This is why open air transfers are OK with this method. You are working with semi-contaminated fungus from the beginning. To do this properly in a laboratory setting we would first have to clone to agar and then clean up our mycelium by doing a number of transfers to clean agar; however, since most home cultivators don’t have the resources for this we must assume our cultures are already contaminated and create an environment that favors mycelium and hope it out grows the mold/bacteria. Mold/bacteria have a difficult time growing on cardboard but oyster mushrooms love it.
Wait about 1-2 weeks for your jars to turn completely white.
Contaminated Jar?
Eventually one of your jars will be contaminated. If they show any signs of green or black, shake them up (with the lid still on), take them outside, open the jar, dump it out, then bury it near some wood chips or trees. Put the lid back on, then wash the jar and lid with soap and water and/or bleach. Check back near the wood chips/tree eventually you might see some oysters. Unfortunately, contaminated jars are no use to cultivators.
* Don’t open a contaminated jar in your house.
* Don’t smell it
* Don’t leave it growing
5.) “Pasteurizing Straw” and Spawning
Materials:
* A large tub
* Hot water
* Anti-bacterial dish soap
* Straw (I used old half moldy straw)
* Old laundry basket
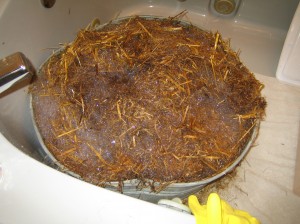 Once your jars are 100% colonized and have turned the entire jar white it is time to spawn to straw.
I used a large metal tub, but I think a plastic one would have been easier to work with. Fill your tub with straw and then start adding hot water. Add the amount of dish soap you would need to wash a load of dishes as large as the straw you are using. The hotter the water the better. The idea is to get the water as close to 160F as possible for 1.5 – 2 hours. You can add boiling water to the straw bath and measure the temperature but I just went with hot tap water and dish soap. Let set for 1.5 – 2 hours.
Take the straw out of the tub and ring it out as if you were ringing wet clothes and place a small amount into the laundry basket. I placed a large garbage bag under my laundry basket as water will slowly leak out causing a mess if you don’t. Take the finished grain spawn and sprinkle a fair amount over the straw keeping the majority of the spawn in the center. Layer more straw. Then add another jar of spawn. You will want an inch or two of straw, some sprinkles of spawn, another inch, other sprinkle. Continue until the basket is filled.
6.) Colonization
Materials:
* 1-2 Weeks @ 65-75F
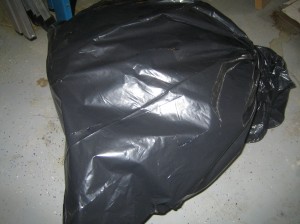 Place the laundry basket inside a large garbage bag with slits/holes in it and wrap the open end and place under the laundry basket (like a loaf of bread). Let this sit over night. A large amount of water may seep out the first night so I found it best to place outside to avoid a mess. After that I let my basket colonize in the garage(check out here for installation of garage doors) where it was 65-80F most days. You can place this just about anywhere that maintains a room temperature. If you put this indoors make sure to have a way to collect excess moisture that may leak out. Don’t forget to makes slits and holes in your bag for gas exchange.
Here is a picture after only a week: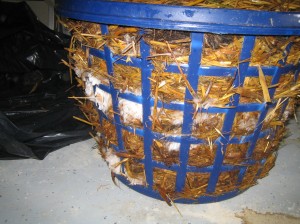
And a picture once fully colonized:
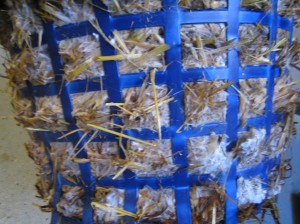
7.) Fruiting
Materials:
* 1-2 Weeks @ 50-70F
After fully colonizing it is time to induce fruiting conditions. Remove the garbage bag and place the basket outside under a tree in the shade for several days. If you have many days in a row where it is dry it helps if you have a sprinkler handy to shoot on the basket; however, it won’t hurt the basket if it dries out a bit and you wait for a good rain to naturally induce fruiting conditions. You actually want the outside straw to dry out a bit. The dry straw will act as contamination barrier and a casing layer.
Depending on the fruiting conditions and strain this may take several days or in my case months (because it was so hot) before your first signs of fruits appear.
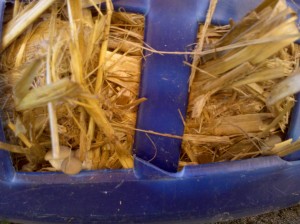 The species of oyster I had chosen wouldn’t fruit until a it was cold shocked to about 50F at night. After the nights started to get colder the fruits really took off.
Here are some pictures 4 days later:
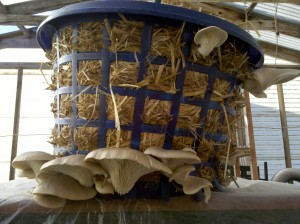
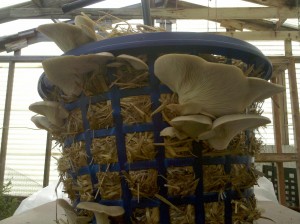 Notice the plastic sheet under the basket. I noticed that some of the fruits started to get dry. I placed a painter’s drop cloth over the basket to keep humidity high. This may not be necessary for you depending on your climate/recent whether. The caps of the mushrooms will tell you when you need to add this over top of your basket. Oysters are highly intolerant of CO2 buildup and will not fruit properly without fresh air. When in doubt leave the plastic off the basket unless the caps are dry or splitting.
Credits:
Dean Robbins – For helping me correctly identify the wild mushrooms and inspiring me to grow.
“Growing Gourmet Medicinal Mushrooms by Paul Stamets” – http://www.amazon.com/Growing-Gourmet-Medicinal-Mushrooms-Stamets/dp/1580081754
Paul Stamet’s “Mycelium Running” – http://www.amazon.com/Mycelium-Running-Mushrooms-Help-World/dp/1580085792

