Tag Archives: Oysters

Oyster Cultivation Update

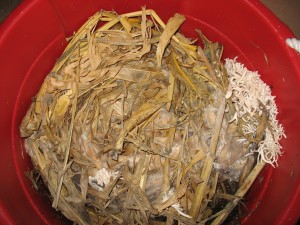
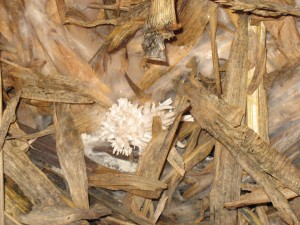
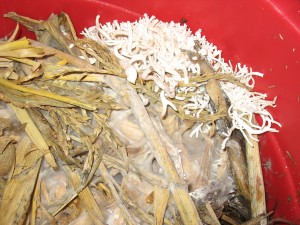
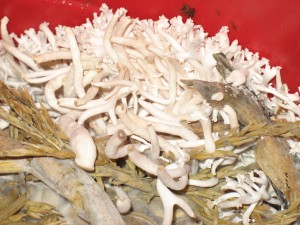
Checked on the oysters growing on cornstalks, and was excited to see mushrooms forming.

There is a couple of clumps forming and the mycelium has spread throughout. The mass may grow pretty fast now that that the fruiting has started! The timing might workout pretty well since the temperatures are almost stable enough to set the tub outside.

Oysters on cornstalkOysters on cornstalkOysters on cornstalkOysters on cornstalk

It is good to see this working because I didn’t have to put much work into it.There is not much much money invested either. The cornstalks were just broken up enough to fit in the tub and soaked in water. Since it is very low tech and low cost it has real possibilities for farmers, both those farming for a hopeful profit and those farming to provide food to  survive.

The cornstalks could have been bagged up and sent to the landfill, and instead will be turned into food. I will keep you updated on this project.

Mushroom Cultivation Workshops

Mushroom Cultivation workshops are a great way to learn mushroom growing and meet other mycophiles.

The second mushroom growing workshop I attended was this last October at the Bioneers conference. This was given by Glenn Babcock of Garden City Fungi in Missoula, MT, gardencityfungi.com. The idea with this workshop was to use a Master spawn to inoculate spawn bags for the participates to take home and establish an outdoor mushroom bed.

The workshop started with an interesting history on Shiitake mushroom cultivation. Then there was a presentation on general mushroom cultivation and life cycle. There was a question and answer session and then we got into the spawn creation.

The master spawn was from Garden City Fungi’s production Oyster spawn. It was in a space bag with a filter to allow gas out and to keep contaminates from getting in. The space bag is essentially a plastic bag with a filter and it is partially filled with sawdust fortified with oats. The bag is then sealed and sterilized. After cooling, the bag is then cut open and inoculated with Oyster spawn by pouring some spawn from the master bag into the space bag and the bag is then resealed. These master spawn bags can be expanded from 1 to 10.

The bags were then taken home by participates to start an outside mushroom bed. The bag was allowed to rest until the mycelium spawn consumed the substrate turning the mixture from brown to white. We were then instructed to remove vegetation from a small area and fill the space with hardwood chips. The space bag was cut open and spread on the wood chips and covered with leaves. The bed is to rest through the winter and flush next spring or fall.

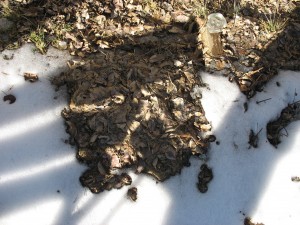
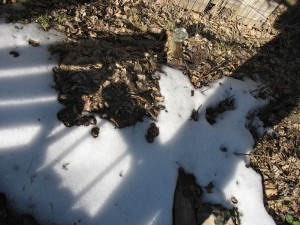
I received a partial bag of master spawn left over from the workshop. I was cleaning up our garden at the time so decided to try and get the spawn to grow on corn stalks. The corn stalks were harvested and thrown in a plastic tub. The stalks were showing signs of mold so I was not sure it would work. The stalks were broken up just enough to fit in the tub and the tub was filled with water. After soaking over night the tub was drained and the spawn was mixed into the wet cornstalks. The tub was covered loosely and left outside since the temperatures at that time, November 1, were between 40 and 60. Acceptable spawning weather for oyster mycelium, but not warm enough for mold. The tub was left outside until the temperature started dropping to freezing at night. I am happy to report at that time the spawn had spread very well for coarse material and the project was brought into my garage. When the weather gets warmer this spring the tub will be put outside and with some luck mushrooms should flush. Checking on it this week the mycelium has spread throughout the substrate and is busy consuming the stalks.

I will report on the status of both the outdoor bed and tub experiments as they progress on this site. With a little luck and planning I should have lots of oyster mushrooms to eat this spring and fall!

Mushroom Cultivation Workshops

Mushroom Cultivation Workshops are a great way to learn how to grow mushrooms and meet mycophiles. I have been to 2 different workshops through the Bioneers Conference.

The first one was with the Missoula Guru Larry Evans with the WMMA and the Fungal Jungal. The idea with this one was to pasteurize straw, and then inoculate the pasteurized straw with Oyster mushroom spawn. Everyone got to participate and take a bag of inoculated straw home ready to produce mushrooms.

The process was simple and straight forward. We broke a bale of straw up, and then ran over it with a lawn mower until it was chewed up to smaller pieces. A steel barrel of water was heated with a propane burner until boiling. Larry had fashioned a basket out of hardware cloth with a handle of wire. we stuffed the basket loosely with straw and plunged it into the boiling water. It stayed about 20 minutes with a brick on top to keep it down. The basket was raised, drained some, and then dumped on a clean tarp. It took about 3 batches to complete. The straw was spread out and allowed to cool to a tepid temperature.

The bags of spawn were then spread out over all of the straw and was mixed by hand being careful not to step on the tarp. The inoculated straw was then bagged up in small plastic bags, and nails were used to poke holes throughout the bag. The bags of inoculated straw were then taken home by participants to grow fresh mushrooms. The mycelium quickly consumed the straw in the bag and in about 2 weeks I had fresh oyster mushrooms to eat.

Me and about 30 other people were turned on to the simplicity and complexity of growing mushrooms. You could see it in their eyes, they were hooked for life. I have been playing around with oyster mushrooms since, and am constantly amazed at the aggressiveness of this mushroom.

If you get a chance to attend a mushroom cultivation workshop, I would highly recommend it.

Mushroom Patches

Mushroom hunting, or harvesting, is all about the patches that you find or grow. Once you find some good places that mushrooms grow, you have a (hopefully) private patch. Patches have obvious advantages because you have found or placed mushrooms there, so you have a better chance of finding mushrooms than wandering around the woods. Don’t get me wrong, I love to wander around the woods!

So you have your patch, and if you are careful you can harvest it for years. I also have found that patchs or mushroomy places sometimes produce several types of mushrooms at different times. Another handy thing about known patches, is they tell you when to wander about looking for new patches. If Oysters are flushing in your known spot, you are likely to find new sources when searching in the woods. I also keep my eye on some patches in town that I won’t eat for a variety of reasons. These patches tell me when my hidden mushroom patches, that are harder to get to, are ready to check.

This brings up an earlier topic of cultivating stump mushrooms, and watching them to indicate when their wild cousins are ready to check . I think this is an excellent way to know when to look for wild mushrooms and helps with identification of the wild cousin. Once you have grown Oysters you will know them in the wild.